Heart-FELT Desires


The reality is it is enormously easy because we are working with a super simple base which serves as a canvas for all of your creative expressions.

2. Each hat on this page started out with a 4x4" (103mm) square of felt. First, treat the felt by washing it with soapy water, working the suds into the fabric. For the synthetic felt, I also put it in a cup of hot water, leaving it until the water cools.
3. Stretch the wool in all directions. These two steps serve to soften the wool fiber and making it pliable to smoothly fit over the hat form.

4. For my first hat, I stretched the wool around the form and tied it at the base.
5. Using a iron on a low setting, I press all around the crown.
6. At the base, I stretch out the gathers and press around the edge and underneath
7. Set aside and allow to completely dry. When dry, untie and cut around the base, allowing a small margin.


8. For this model, I decided to use an inner hatband. I don't have access to a milliner supply store and didn't want to wait to order online. Instead, I used a narrow strip of elastic. Stitch to the edge (and not directly through to the hat. I ran my iron along the inner edge of the hem. If the hat has stretched a bit, you can put it back on the form, spray lightly with water and press the hat again with the iron.
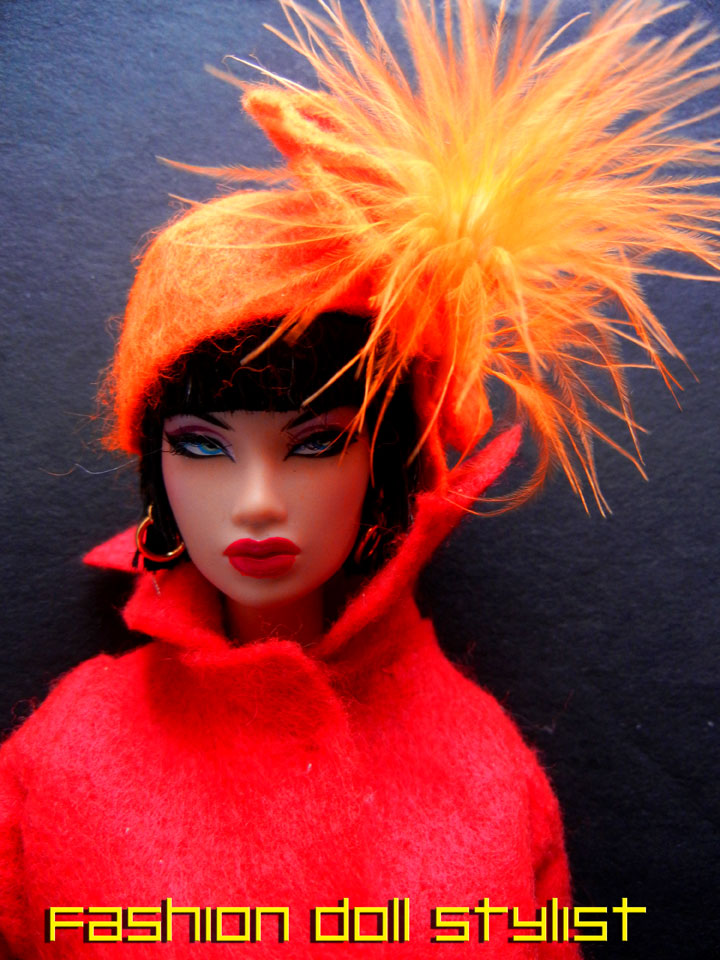
9. For the finished look, I simply took the scraps, gathered them into a bunch and made a stitch at the center. Attach to the side of the hat and voila! Feel free to add feathers, fur trim, lace, ribbons, rhinestones, tulle.... For example:


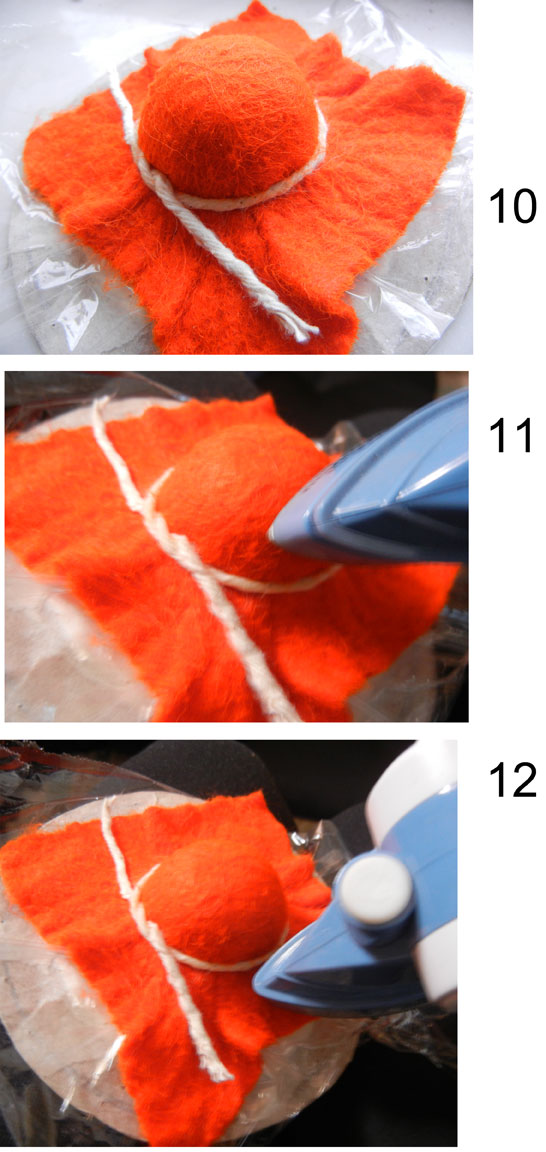

14. I cut away what I won't use.
15. Then press the felt below the cord. You can use the cord to guide your scissors as you cut the excess away. Or you could press this down into a brim.

I made another hat using a purple felt. Instead of cutting away the excess, I thought it would be fun to leave as is. The result reminds me of head gear reminiscent of Japanese fashion from the 1990s.

This process worked so remarkably well (I made 10 hats in two days), I decided to see what would happen if I used scraps of wool jersey.


16. The takeaway is that your hat will take the shape of whatever is underneath. A quick tour around the house and I found bottle tops, product caps and the like to shape my hats. Whatever you choose should be slightly smaller than the dolls head (as it will stretch when dry).

18. Adjust the gathers around the rubber band so as to make everything above smooth.

20. Cut away the excess. For this series of hats, I've left the rough cut edge.
21. I love the sharp edges of this container. The result is that perfect Jackie Kennedy pillbox!


No matter how simple or how elaborate your tastes lie, use your imagination and make this basic felt hat your own!

All images and text property of Fashion Doll Stylist. Copyright 2016.
Follow us on Twitter: @FashDollStylist
Like us on Facebook: facebook.com/FashDollStylist
We're also on Pinterest: pinterest.com/FashDollStylist


Nhận xét
Đăng nhận xét