Singing the Blues


I started out with the intentions of doing just three patterns, and as usual, I became so fascinated by the process I had to stop myself at six so that I could write this post!

The first pattern that caught my eye was one of stripes. For this project, you will need fabric, some sort of cylindrical object (I used the metal rod of my vacuum cleaner), cotton string, fabric dye, vinegar, salt, water, rubber globes and two containers--one for the dye bath and the other for the colorfast bath.

2. Roll it up.
3. Wrap the string twice around the pole and tie. Repeat every 3/4" (18mm).
4. Then crush everything down into one compact unit.

6. Take the fabric wrapped pole and FIRST, dip it in water. (This step is important.)
7. Now submerge the pole in the hot water for about 10-15 minutes.
8. Put on rubber gloves. Remove from the dye bath. Remove the strings
9. Rinse well under warm running water and rinse until the water runs clear. In the second bowl, mix together 1 cup of water, 1/4 cup of white vinegar and 1 teaspoon of salt. Drench the fabric well, then rinse once again to make it colorfast. Dry.

This is the result!!!

Here's another classic technique.

2. Fold it into one long length.
3. Fold the corner into a triangle.
4. Fold the triangle up and over into another triangle. It's like folding a flag.
5. Continue to fold until all the fabric has been folded up. Take a piece of cardboard and cut two triangles the same size as your fabric packet. Make a sandwich with these and your fabric packet but place them so the points are opposite to those of the packet.
6. Use a clip to hold in place. (You can also use rubber bands.)
Dunk in water and proceed with the dye bath as described above.


2. Once in a long strip, begin to fold the strip into accordion folds to form a small, square packet.
3. Bind the packet by wrapping string around several times in both directions. The image on the left is what this produces.

Now that you understand there are so many different ways you can take this.

Here, we simply took the fabric and scrunched it up into a ball.
Next, we wound the cotton cord, helter skelter all around it.
The result is a sort of a techno sonic space print!

Let's do one more.

2. Next, I applied a variety of clips and clamps to both sides of this folded material.
3. After the dye bath is completed, the result resembles a sort of Xray of bones!!!
As you see, everywhere the clip pressed into the fabric, it kept the dye away. The result is a random patterned ethnic-print.

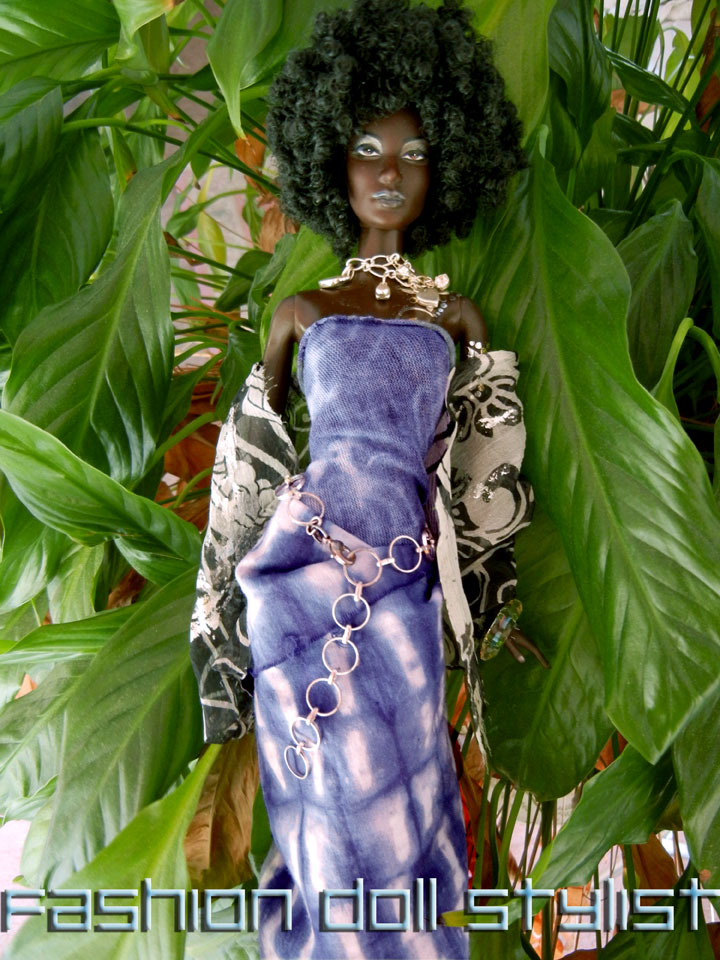
What I will suggest is that you make a variety of experimentations using different fabrics, dyes, maybe even colors. For this project, I've used my samples as little scarves to drape the girls' outfits. But when cut into jackets, dresses, pants and tops....they all make for a stunning collection of summer fashions!!!
Follow us on Twitter: @FashDollStylist
Like us on Facebook: @FashDollStylist
We're also on Pinterest: @FashDollStylist
Come join us on Instagram and show off your stuff: instagram.com/fashiondollstylist


Nhận xét
Đăng nhận xét