Easy Straw Hats

The other day while strolling through my local crafts store when I spotted packages of raffia which brought back memories of a project we did at a school I worked for in Paris. The seniors had to make their own accessories for their mini fashion collections. One girl made a series of hats made from raffia which I later bought. The process for making straw hats is pretty simple. You braid the raffia, shape it over a form and sew the braids together.


2. The width of braid you want to create will dictate how wide or fine each strand will be. Let the raffia soak in water for a few minutes.
3. Take three strands and braid together. Knot the braid on both sides.
4. Iron the braid flat. You should create a few braids. The bigger the hat, the more braids. For my sun hat, I made about 3-4 braids.

6. Pin on the crown.
7. Now begin to wrap the braid around the form, placing pins to hold in place. When you run out of one braid, add another in by criss-crossing the edges and keep wrapping around the form. (See the instructions for the next hat for more detail.)
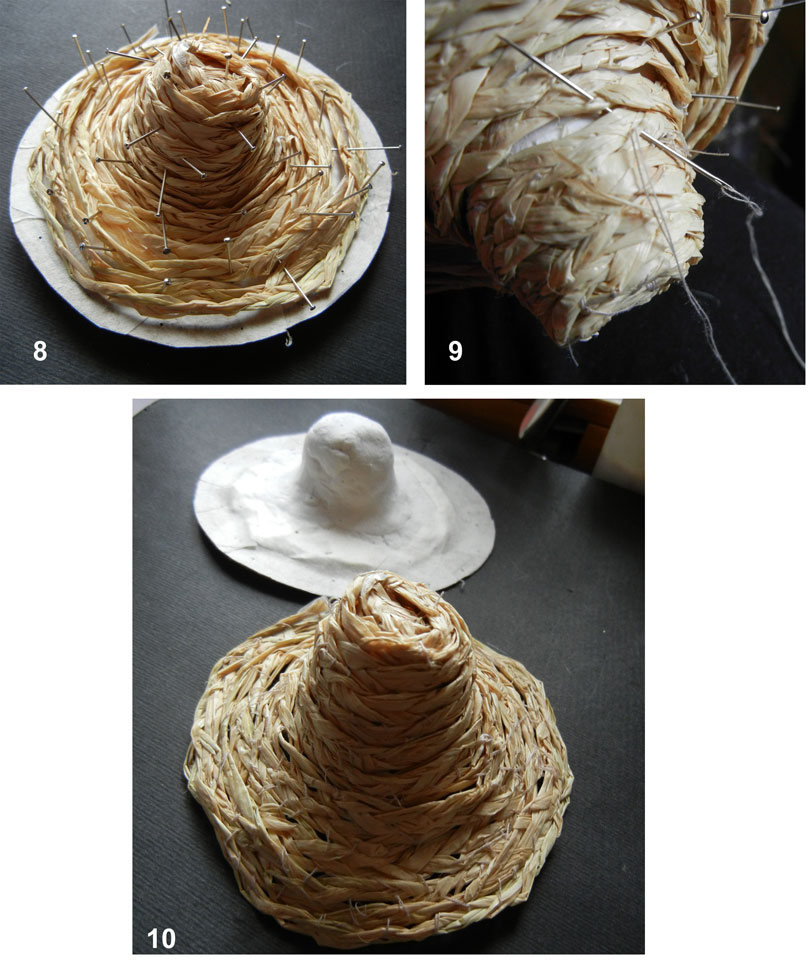
9. With needle and thread, sew the strands together using the smallest stitches possible. The stitches will be visible so you will want to choose a thread perfectly matched to the color of the raffia. (Raffia is sold in different colors, by the way!)


Even though this is a rustic summer straw hat, you can transform this into something more high fashion.


1. Again, prepare the raffia. Start by tucking one edge under the rest of the braid.
2. Pin to the crown of the form.
3. Wrap around the form, pinning in place.
4. One braid has run out. I added a second one. Note how I've criss-crossed the edges. This forces the edges to the interior of the hat. Wrap the braid around to hide the end of the previous braid.
5. To keep the edges from unraveling, dip each edge in glue and let dry.

7. Sew the braids together.
8. When you get to the end, clip the edge.
9. Then tuck the end into the interior of the hat and sew or glue in place.


Follow us on Twitter: @FashDollStylist
Like us on Facebook: www.facebook.com/FashDollStylist
We're also on Pinterest: www.pinterest.com/FashDollStylist
Come show us your stuff on Instagram: www.instagram/fashiondollstylist.com
All photos and text, property of Fashion Doll Stylist. Please do not reproduce without prior permission. Thank you.


Nhận xét
Đăng nhận xét