Chanel-ify Your (Doll) Fabric

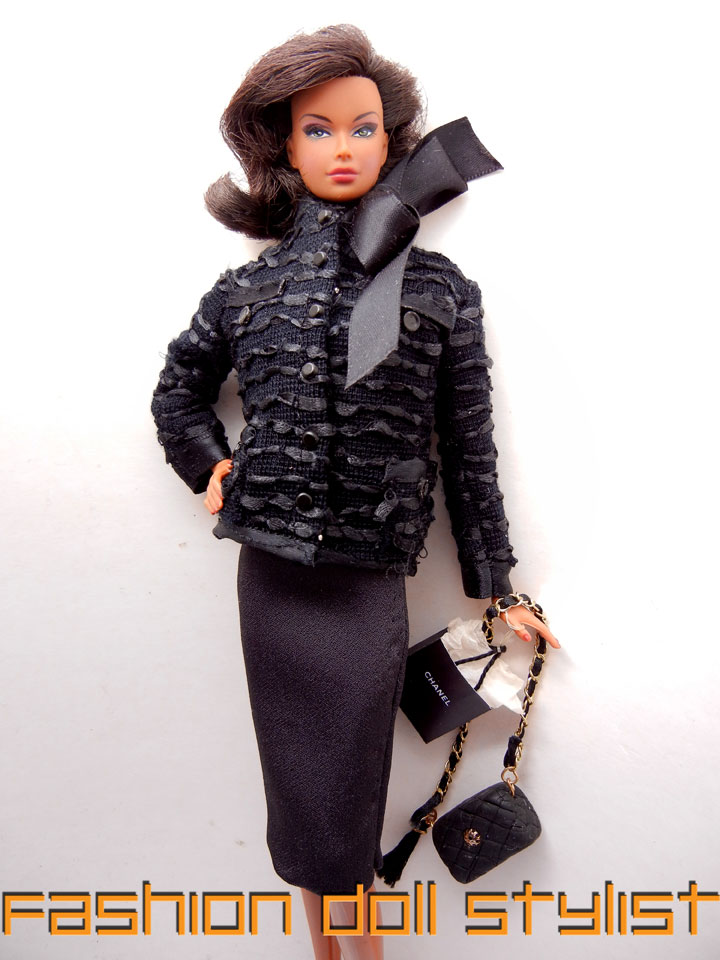
Ahhhh...nothing like a vinyl diva in a Chanel suit!!! No matter what everyone's taste in doll fashions are, the Chanel suit always seems to be a favorite in the fashion doll community. Awhile back we addressed this phenomena here at Fashion Doll Stylist with a post entitled, "Let's Talk Chanel." However....a Chanel suit is more than just a four-pocket boxy jacket outlined in ribbon trim worn over a straight skirt. The notorious fashion house has, to a certain extent, abandon this style in favor of other looks.... which means, the most important part of a Chanel look today is that chunky FABRIC! But to the doll fashion crafter, the problem remains the same...where to find that special material that magically transforms an ordinary jacket & skirt into one that screams....CHANEL!

Create Swatches First!
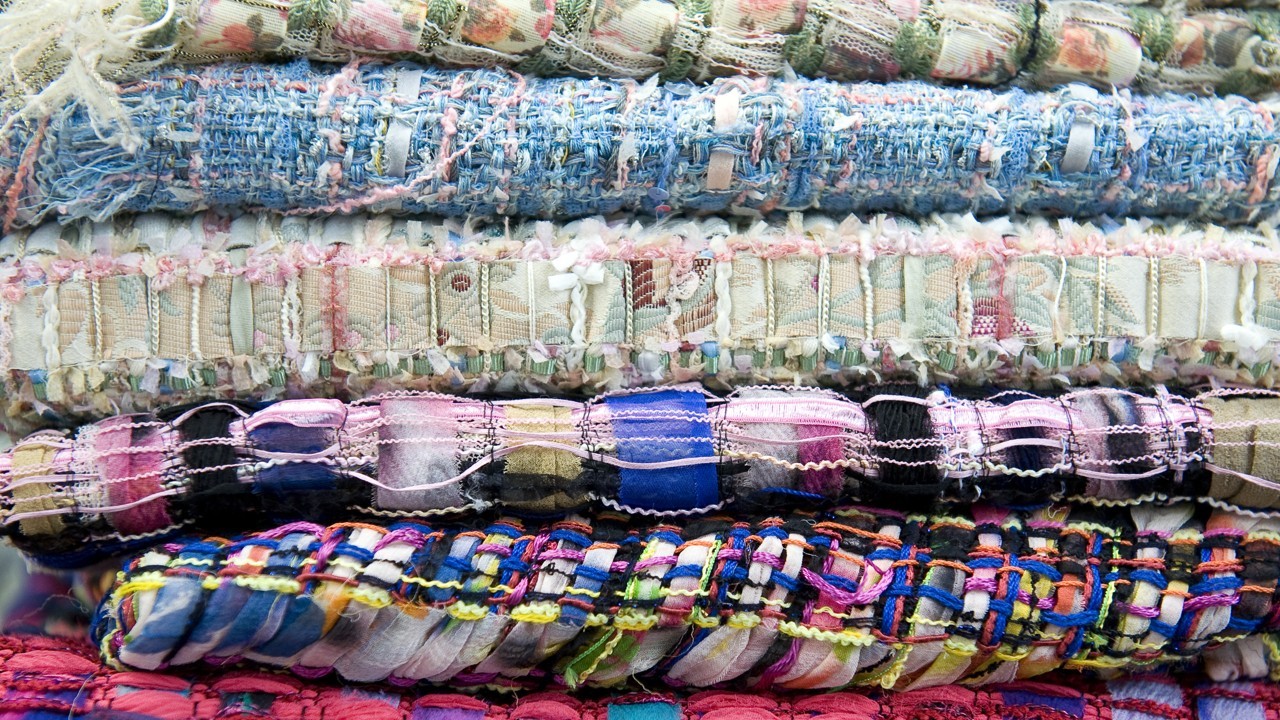
If you can find it, loosely woven fabric, is ideal. However, you can use more closely woven fabric so long as it is not dense. When you hold it up to the light, you should be able to see the threads. For the beige dress, I cut up an old raw silk blouse of my mom's to start--which is what I used to create the "Chanel" coat dress in my last post. It is beige, mottled with tiny brown specks. Perfect! I probably could have used it without doing anything, but I wanted it to really resemble the real deal, so I made a sample of stitches first. All you need is an embroidery needle with a very big hole. Anything that fits through the eye of it, you can use: ribbon, embroidery yarn, strips of cut fabric, heavy-duty thread.

Depending on the look you want, the time you feel like allotting to this project (it is a bit time-intensive), and the materials you have on hand--you can simulate whatever "couture" fabric needed to create Dolly Chanel fabric. As you can see in the above photo, I tried a number of materials, including drawing lines using a small brush and acrylic paint. Frankly, there are no rules. I cut 1/8" (3mm) strips of silky fabric. The strips were not even, which was not important for the rustic look I was hoping to achieve. With my threaded needle I caught one thread of the fabric and skipped over about 1/8 or 3/16" (3-5mm), then caught another thread, etc. Using cut fabric, as you thread each strip through the fabric, it will begin to fray, thus adding additional texture. Sometimes the fabric broke. But you re-thread and keep going. I cut strips of sheer nylon which didn't fray. They lent an air of lightness to the fabric. If you use commercial 1/8" ribbon, the look is more even, more polished.

Note: I opted for white on black, but you if take another look at my initial Chanel fabrics & jackets, you see that there are also colors and plaids! Feel free to get creative, even colorful with your "couture fabric!"
How to Proceed


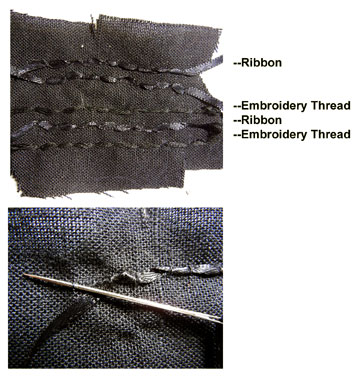
 1. Cut the end of each strip on the diagonal so you can more easily thread your needle. You only want to thread a single strip (not double), so keep a short end of your strip near the needle.
2. With each strip, I slip the fabric loaded needle through a single (or two) thread of the fabric. I skip over 3/16"-1/4" before catching the next thread. Do one row at a time. Leave a little extra beyond the edges of each pattern piece.
3. I left a space of about 1/4" in between rows. Keep adding until the entire piece is complete.
When you have finished this, sew a stitch around the edges of each piece to secure your rows of ribbon. Note: my fabric is very loosely woven, so to keep it from stretching and to add more structure, I lined each pattern piece with an underlining. An underlining is made using the exact same pattern pieces, but cut from a lightweight material. The underlining and the fabric piece are sewn as one. You can either finish the edges with bias tape or you can sewing in a separate lining. Just before you allow enough ease at the side seams of the outer garment to accommodate the extra layers. Now lay the garment pieces out and sew together as usual being careful that the ribbon falls away from the edges are caught in the stitching. If, by chance, a ribbon did not get sewn while you were stitching this together, you can always take needle and thread and stitch it down to the fabric!
Taking into consideration I used a very simple pattern and the pieces are very small, it took me about a day to prepare my fabric for each garment. The looser the weave, the easier and faster you can work. And yes, this was a lot of work....but remember we are replicating a very expensive designer suit! The end result speaks for itself.

One last thing....initially, this post was supposed to show a number of different surface treatments I used while putting together last month's fashion reports. But I was so happy with the results I obtained for my Chanel inspired dress, I decided to focus on the fabric I altered. For the next post I'll share with you a few more ways to customize fabric.
Follow us on Twitter: @FashDollStylist
Like us on Facebook: @FashDollStylist
We're also on Pinterest: @FashDollStylist
And of course, we are on Instagram: @fashiondollstylist


Nhận xét
Đăng nhận xét